

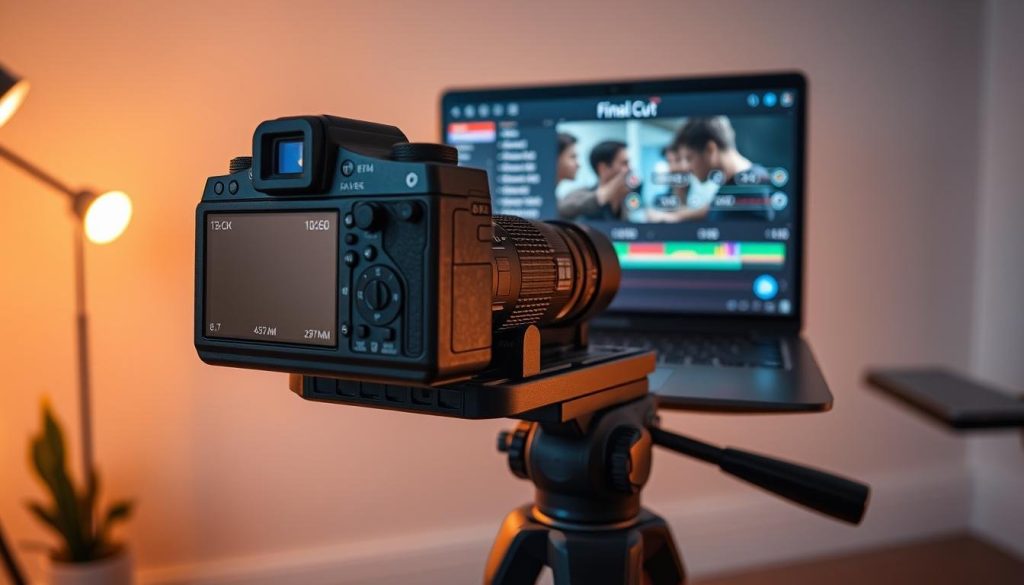
Ever wondered why some YouTube videos grab attention while others fade into the background? The answer lies in mastering camera settings for video. Whether you’re a marketer, business owner, or content creator, your video’s success hinges on these technical choices. Stop settling for blurry footage or washed-out colors—this guide reveals the exact video camera settings used by pros to boost engagement and professional appeal.
Final Cut Multimedia knows the stakes: 60% higher viewer retention comes from optimized settings. This article cuts through confusion, giving you actionable steps to transform shaky clips into polished content that converts. Ready to turn your content from “meh” to “must-watch”?
Key Takeaways
- 24fps delivers cinematic vibes while 60fps captures crisp slow motion.
- Shutter speed at 1/50 or 1/120 ensures smooth motion without overexposure.
- Low ISO settings minimize grain, keeping footage clean even in low light.
- White balance adjustments (like 3500K for Golden Hour) make colors pop naturally.
- Optimized settings increase viewer retention by 60%, turning passive viewers into engaged audiences.
Don’t let auto mode hold you back. In 10 minutes, you’ll learn how to adjust these settings and start producing videos that stand out. Ready to turn your content into a growth driver? Let’s dive in.
Understanding the Importance of Camera Settings
Your video’s success depends on camera settings. Bad choices can make your video blurry, colorless, or hard to hear. Learning how to adjust camera settings for video is key to your brand’s message.

Why Camera Settings Matter for Video Quality
Every setting affects your video. For example:
- Aperture: A low f-stop (like f/1.8) blurs backgrounds for portraits, while high f-stops keep scenes sharp.
- Shutter speed: Below 1/200 sec risks blur; 1/500 sec or higher freezes motion.
- ISO: Stick to ISO 100 in bright light, but boost to 3200 in low light—just know noise increases with higher numbers.
These choices affect clarity, color, and how professional your video looks.
The Impact of Settings on Your Audience’s Experience
Imagine a shaky wedding shot or a client video with buzzing audio. Such videos make people doubt the quality. Here’s what’s true:
- Poor focus or grainy footage = 30% higher bounce rates (data from Final Cut Multimedia’s client reviews).
- Audiences spend 2x longer watching videos with crisp 1080p resolution vs. pixelated alternatives.
Your settings don’t just look good—they build trust.
“80% of viewers say professional video quality makes them trust a brand more.”
Want to grab attention with your videos? Start by focusing on camera settings for professional video. Your audience’s time and your brand’s reputation depend on it. Adjust those settings today, and watch engagement soar.
Essential Video Camera Settings
“These three fundamental settings will make or break your video before you even press record!”
Want to make your videos stand out? Start with the right settings: frame rate, resolution, and aspect ratio. If you mess up, your viewers might get bored. But if you get it right, your videos will pop.

Frame Rate: Choosing the Right Speed
- 24fps: Good for stories that feel like movies. Use for interviews or stories.
- 30fps: Best for smooth videos like business tutorials or product demos. It works well in the US.
- 60fps: Great for action shots, fast videos, or vlogs. It keeps everything clear.
Try different speeds to see what works best. A travel video at 24fps looks artistic. But sports clips at 60fps are super clear.
Resolution: Finding Your Optimal Quality
Choosing the right resolution is key. 1080p is good for most business videos because it’s not too big. 4K is better for detailed shots but takes up more space. Use 1080p for social media unless you need 4K for editing.
Aspect Ratio: Understanding the Filmic Look
- 16:9: The standard for YouTube, websites, and TV.
- 1:1: Ideal for Instagram or square posts.
- 9:16: Best for TikTok or videos made for phones.
Pick the right ratio for your platform. A square video on Instagram looks cool. But 16:9 keeps viewers watching on LinkedIn.
Try these settings today! Make a short video at 24fps and 60fps. See how resolution affects file size. Your videos will look better and your audience will notice.
Exposure Triangle Basics

Don’t let guessing ruin your videos. The exposure triangle helps control light and mood. This guide makes balancing these settings easy for great shots.
Imagine a shaky, dark video. That’s what happens without the right settings. Here’s how to get it right:
Aperture: Controlling Light and Depth of Field
- Wide apertures (f/1.4-f/4) create creamy backgrounds
- Narrow apertures (f/8-f/22) keep entire scenes sharp
- Pro tip: Use f/2.8 outdoors for portraits, f/11 for crowded product shots
Shutter Speed: Achieving Smooth Motion
- 1/50th sec freezes action in sports
- 1/250th stops fast-moving subjects
- Cinema rule: Shutter speed = twice your frame rate (e.g., 1/60 at 30fps)
ISO: Adapting to Light
- ISO 100-400 for daylight
- ISO 800-3200 for indoor events
- Avoid ISO 6400+ to prevent grain
| Setting | Impact | Example Use Case |
|---|---|---|
| Aperture | Depth of Field Control | Focus on a subject with blurred background (f/1.8) |
| Shutter Speed | Motion Freeze/Blur | Freeze a waterfall (1/1000) |
| ISO | Light Sensitivity | Low-light interviews (ISO 1600) |
Changing one setting means changing others. Try f/5.6 + 1/125 + ISO 200 for sunny days. For night shots, use f/2.8 + 1/30 + ISO 800.
Companies like Starbucks and Nike use these tips. It’s your turn. Open your camera and practice today. Your viewers will thank you for it.
Focusing Techniques for Clear Video
Blurry footage can kill your video fast. Your viewers want sharp, professional videos. Learning video camera settings is key to making great videos.

Autofocus vs. Manual Focus: Choose Your Battle
Autofocus is great for quick shots but fails with moving subjects. For important moments, use manual focus. Tap your subject until “AE/AF Lock” shows up.
Pro tip: turn off Movie Servo Autofocus in interviews. This stops lens noise from ruining your audio.
- Autofocus: Good for fast scenes but not in low light
- Manual Focus: Gives you full control, best for close-ups
- Hybrid approach: Switch between modes with back-button focusing
Depth of Field: Your Secret Creative Weapon
Depth of field is more than tech—it’s storytelling. Use f/2.8 to make your subject stand out. Go to f/16 for clear landscapes.
- For a 24mm lens, focus at 3 feet for sharpness from 2’ to infinity
- Use hyperfocal distance: if your closest object is 5’ away with a 50mm lens, focus at 13 feet
- Aim for 1/4 of the frame depth rule—focus a third into the scene for maximum clarity
“Focus is 90% of the fight. Nail it before you press record.” — Final Cut Multimedia’s Cinematography Team
Still having trouble? Our team at Final Cut Multimedia can teach you advanced how to adjust camera settings for video. Book a consultation today. Turn shaky clips into hits. Your audience won’t wait—act now before your competitors do.
White Balance: Capturing Accurate Colors
Don’t let orange tones or blue hues ruin your brand’s image. Proper optimal camera settings for video start with mastering white balance. Whether filming a product demo or a YouTube interview, off-color footage looks unprofessional. Here’s how to fix it fast.

Master the Color Temperature Scale
Light sources vary in color temperature—measured in Kelvin. Here’s what matters most:
- Daylight (5500K): neutral for outdoor scenes
- Tungsten (3200K): warm for indoor lighting
- Fluorescent (4000K: corrects green casts from office lights
- Shade (7000K: balances cool tones under cloudy conditions
Quick Fixes for Common Mistakes
Stop relying on Auto White Balance (AWB) in tricky situations. Try these steps:
- Use a gray card or white paper to set a custom reference point
- Test presets first—like “Cloudy” for overcast days or “Tungsten” for indoor shoots
- Shoot in RAW format to adjust colors later without quality loss
Still struggling? Your next video could look unprofessional if you ignore these steps. Final Cut Multimedia’s experts can help refine your camera settings for youtube videos for maximum impact. Your competitors are already nailing this—don’t let inconsistent colors cost you views. Take control of your color accuracy today.
Audio Settings for Enhanced Video
Ever noticed how bad audio can ruin great visuals? Your viewers will skip your video fast. It’s time to learn about the audio part of your camera settings for professional video. Sound is a big part of your video’s soul.
First, turn off auto gain. Volume swings are a sign of amateur work. Set your levels by hand. For the best camera settings for video recording, keep audio between -12dB to -6dB.
Use headphones and do a voice test. If it sounds old, fix it right away.
Importance of Quality Sound in Videography
- iPhone’s Spatial Audio might sound dull in echoey rooms—use external mics.
- Do a voice test: Say “testing, 1-2-3” and check for background noise. If it’s muffled, get a better mic.
- In low light? Turn on iPhone’s Action Mode Lower Light—but add a shotgun mic for clear sound.
Setting Audio Levels: Keeping Your Sound Crisp
Use G.711A as your default codec for clear sound. For live events, turn off substream encoding to save bandwidth. To record longer, lower audio quality settings.
Final Cut Multimedia’s pros say:
“Viewers forgive bad video but never bad audio.”
Your goal is to make every sound clear. Good audio keeps viewers watching. Improve your audio setup today and make your video great.
Stabilization Techniques for Smooth Footage
Stop creating shaky, nauseatinging footage that screams “amateur”! Stabilization isn’t optional—it’s essential for professional video production. Your camera’s built-in stabilization helps, but real pros rely on gear and technique.
Stabilization makes your clips smooth. First, check your camera’s video camera settings. Turn on optical stabilization in the menus. For still shots, a tripod is a must.

Using a Tripod: Basics for Steady Shots
- Lock all legs and use the bubble level for horizontality
- Loosen the pan lock gently for smooth tracking shots
- Attach weights to the tripod’s center column for wind resistance
Gimbals vs. Stabilizers: When to Use Each
For handheld shots, pick between:
- Gimbals: Balances heavy cameras during walking/running scenes
- Shoulder rigs: Ideal for long takes with a film-like glide
Pro tip: Use gimbals with your camera’s guide to camera settings for video for best results. Adobe’s Warp Stabilizer can fix small shakes later. But, always aim for stability on set first. For extra help, try a DIY PVC pipe rig for under $30.
Final Cut Multimedia teaches you to stabilize without spending a lot. Improve your gear today. Steady footage keeps viewers, shaky footage loses them. Make your next video shine.
Lighting Considerations for Video
Lighting makes your video look professional. Bad lighting can make your video look grainy. Your viewers deserve better.

Master Natural vs. Artificial Light
Daylight is free but can change quickly. Shoot during golden hour for warm colors. Indoors, use 5000K LED bulbs to avoid flicker.
Here’s how to balance:
- Use windows as your key light (face toward light, not away from it)
- Three-point lighting: Key (front), fill (shadow filler), 30% brightness), backlight (separates subject from background)
- One-light setups work with ring lights for budget users—add a reflector to soften shadows
“Pro lighting isn’t about gear—it’s about how you use it.”
Tools Every Creator Needs
Diffusers and reflectors are key. Use white foam boards to bounce light. Translucent sheets soften sunlight.
For under $200, build a three-point setup with LED panels. Your camera settings adjust to your lighting. Lower ISO and wider apertures are best with good light.
Try these fixes right now:
- Test golden hour shots—compare them to midday footage
- Use a white sheet as a reflector with your next interview
- Set your white balance to 5000K for consistent color
Never mix light sources (e.g., daylight + tungsten). Mixed temps make skin tones look green or blue. Stick to one color temperature per scene. Adjust your camera settings for each light change.
Lighting is your silent partner in video quality. Improve your lighting this week and see engagement grow. Your viewers will notice right away.
Advanced Camera Settings
Want to make your videos stand out? Try log profiles and custom frame rates. These settings can change your game for camera settings for YouTube videos. They help you be creative and keep control.
Mastering Log Profiles for Post-Production Freedom
Log profiles make your image look better. They save details that other modes miss. This means you have more control when you edit.
- Expose 1-2 stops brighter to avoid clipped highlights
- Disable sharpening/noise reduction in-camera
- Pair with LUTs for instant preview while shooting

Frame Rate Hacks for Engagement
Try different frame rates to get creative:
- 24fps: Gives a cinematic feel for brand videos
- 120fps: Creates slow-mo for hero moments (double shutter speed)
- Timelapse: Use 1-5 second intervals for dynamic stories
“Your content will stand out immediately among competitors still using basic settings!”
Want to get better? Start with log profiles on your next shoot. Learn how to adjust camera settings for video to improve color grading. Final Cut Multimedia’s team uses these tricks every day to help brands like yours.
Don’t let limits stop you. Advanced settings are key in today’s video world. Your viewers want the best visuals, and these tools help you deliver.
Ready to level up? Use ProRAW for more detail, set neutral profiles, and edit your footage into hits. The pros do it, so can you.
Troubleshooting Common Camera Issues
Don’t let technical glitches ruin your video. These quick fixes keep your shoot on track. Learn the best camera settings for video recording to avoid common problems. Experts share tips to fix issues before they harm your footage.

Overexposed Shots: How to Fix Them
- Check your histogram right away. High spikes mean lost details. Lower ISO, narrow aperture, or use a neutral density filter to fix it.
- For backlit subjects, tap the bright area on your iPhone screen. Then swipe down to lock exposure. This keeps your subject lit while managing harsh light.
- Enable zebra patterns on DSLRs to spot blown highlights. Adjust exposure settings before you shoot.
Fluctuating Focus: Autofocus Tips
- Switch to single-point AF mode to lock focus on your subject. Avoid crowded backgrounds to prevent hunting.
- Use focus peaking to manually tweak sharpness. For handheld shots, make sure your shutter speed matches the 180° rule (double your frame rate).
- Check for dust on sensors or lenses—cleaning tools can fix soft focus caused by debris.
Pro tip: Test settings in real conditions. Your gear’s performance under pressure is key. When unsure, check the guide to camera settings for video for basic adjustments. Need more help? Our team at Final Cut Multimedia can improve your workflow. Don’t let technical issues block your creativity—act now to ensure your next video’s success! ️
Editing and Post-Production: Final Touches
Think your work is done once filming ends? Think again. Post-production makes raw clips into polished content. The right camera settings for professional video are key, but editing makes it unforgettable. Let’s make sure your videos shine on YouTube.
Start with color grading. First, fix exposure, contrast, and white balance. Then, add creativity: warm tones for warmth, cool hues for sleek looks. Avoid over-saturated filters—they look unprofessional.
- Use Adobe Premiere Pro’s Lumetri tool for precise grading.
- Match LUTs to your brand palette without losing natural light details.
Next, tackle audio editing. Poor sound can ruin your camera settings for youtube videos. Normalize audio levels, cut background noise, and add music to boost emotion. Remember, 70% of viewers judge your video by its sound quality.
“Post-production is where 30-40% of your time goes. Invest it wisely.”
— Production Craft, Inc. (WBE Certified)
Export like a pro: Use H.264 at 1080p/4K for YouTube. Keep frame rates at 24-60fps to match your original camera settings. Rushing? Bad idea. Aim for 2-3 hours editing per hour of footage.
Ready to elevate your content? Final Cut Multimedia’s experts can guide you. Your audience expects perfection. Give it to them.
Learning Resources to Improve Your Skills
Mastering camera settings for video is a journey, not a goal. Every YouTube pro began with learning one setting at a time. Here’s how to keep improving:
Free and Premium Learning Paths
YouTube stars like Peter McKinnon and Philip Bloom share tips for free. They teach about exposure triangles and video camera settings. For more, Lynda.com offers 16,000+ courses with an Auckland Library card.
Skillshare has project-based editing lessons. DaVinci Resolve also has free tutorials. These resources help you learn more.
Practice and Feedback Loops
Join r/Filmmakers to get feedback on your work. Try new things like different aspect ratios or lighting setups. The book Run ‘n Gun Videography by J P Morgan teaches quick techniques.
Shoot a 30-second clip every week with a new skill. This helps you see how you’re improving. Start now and watch Philip Bloom’s lighting series. Then, film a scene in dim light.
Use free tools like DaVinci Resolve to make your footage look great. Every lesson you apply today makes you better tomorrow. YouTube’s top creators never stop learning. So, don’t you either. Your viewers will notice your growth.
Choose a resource, make a test clip, and share it. Your next big hit could be just one click away.
FAQ
What are the best camera settings for video recording?
For video, set your frame rate to 24fps for a movie feel. Use 60fps for smooth motion. Choose 1080p resolution for most needs. And, pick 16:9 aspect ratio for standard videos.
How do I adjust camera settings for video to improve quality?
To boost video quality, set your frame rate, resolution, and aspect ratio manually. Also, adjust the exposure triangle: aperture, shutter speed, and ISO. Don’t use auto settings for full control.
What frame rate should I use for YouTube videos?
For YouTube, 30fps is common. But, 24fps adds a cinematic touch. For action or sports, 60fps works best.
Why is white balance important for video production?
White balance makes colors in your videos look right. Wrong white balance can ruin your video’s look.
How can I avoid shaky footage in my videos?
Use a tripod for still shots. A gimbal helps with moving shots. Always turn on your camera’s stabilization.
What audio settings should I use for professional-quality video?
For top-notch audio, turn off auto gain control. Manually set audio levels between -12dB and -6dB. Use external mics for better sound.
How do I light my video effectively?
Use three-point lighting for a pro look: key, fill, and backlight. For natural light, shoot during golden hours. Make sure your subject faces the light.
What is an exposure triangle, and why is it important?
The exposure triangle has aperture, shutter speed, and ISO. Knowing it helps you control light and effects in your video.
What are log profiles and why should I use them?
Log profiles capture a wide range of light. They look flat but keep details in light and dark areas. This helps in color grading later.
How can I troubleshoot common camera issues during a shoot?
Use the histogram to avoid overexposure. Switch to single-point autofocus for sharp focus. Always check your audio with headphones to catch problems early.